TAKEN FROM CTMH'S BLOG...
Block Alphabet Thin Cuts Technique
Our Die-namite! sale is in full swing, so why not share yet another way to use our Thin Cuts!
For those of you stumbling across our blog for the first time, Thin Cuts are our special line of metal dies that you can use to cut paper shapes by running them through a die-cutting machine, like the Cricut Cuttlebug™. They come in a variety of shapes and sizes, and some even coordinate with specific stamp sets. You can create exact shapes, over and over again, without using scissors! And the only thing better than that is that they are on sale through the end of the month at 25% off individual sets and 30% off select bundles! (For a complete list of our Thin Cuts, click here.)
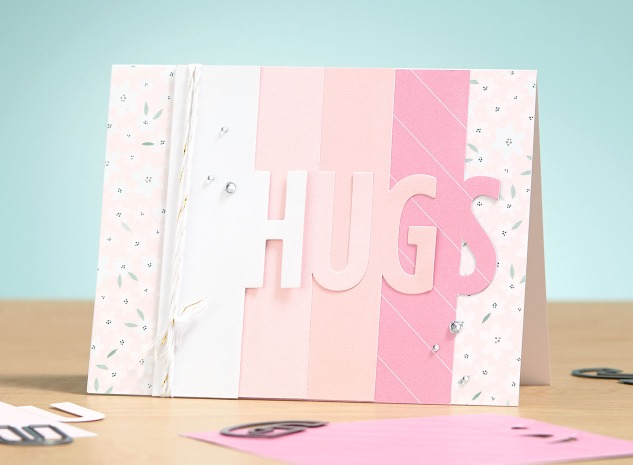
Now let’s talk about that super cute card sending everyone out there HUGS. We made the card above using our Block Alphabet Thin Cuts and a partial die-cutting technique. The step-by-step instructions below will guide you through the process of re-creating this card, or one like it with a sentiment of your choice!
Materials Needed:X7228B Gimme Some Sugar Paper Packet
Z3350 Whimsy Fundamentals
X5941 Bashful Cardstock
1385 White Daisy Cardstock
Z3386 Thin Cuts—Block Alphabet
Z3274 Clear Sparkles
Z1263 Bitty Sparkles
Z4014 White & Gold Twine
Z3372 Adhesive Runner
Washi Tape
Die-cutting Machine
Z3350 Whimsy Fundamentals
X5941 Bashful Cardstock
1385 White Daisy Cardstock
Z3386 Thin Cuts—Block Alphabet
Z3274 Clear Sparkles
Z1263 Bitty Sparkles
Z4014 White & Gold Twine
Z3372 Adhesive Runner
Washi Tape
Die-cutting Machine
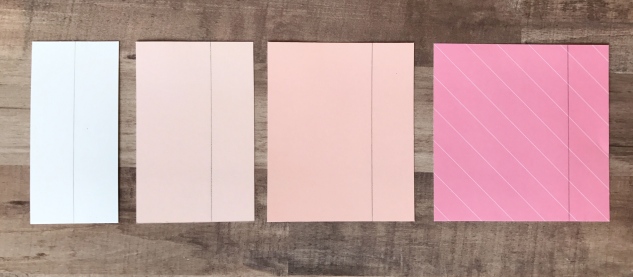
Prepare and Cut.
To replicate our card exactly, you will need the following pieces:
- 1 standard card base
- 2″ x 4¼” White Daisy cardstock
- 2¾” x 4¼” light Bashful cardstock (our cardstock is 2-toned and we used the light side for this piece)
- 3½” x 4¼” Bashful cardstock
- 4¼” x 4¼” white flowers on Pixie paper from Gimme Some Sugar paper packet
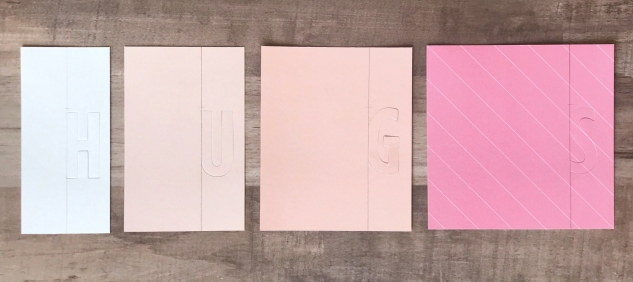
Step 1. Planning your letter placement.
With a pencil, lightly draw a line 1″ from the right edge on all four cardstock pieces.
Step 2. Attaching the alphabet Thin Cuts.
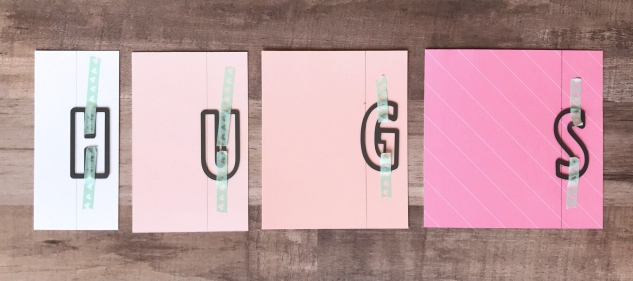
Again, with a pencil, lightly mark 1 3/8″ from the top of the cardstock. Align the top of the alphabet Thin Cuts with this mark and the left edge slightly over the line you drew in step 1. You should be able to see the pencil line on the inner edge of the die. Once your dies are aligned, secure them with washi tape.
Tip: make sure your letters are in the correct order. The first letter should be on the shortest paper and the last letter on the longest.
Step 3. Partially cutting the letters.
As our preferred die-cutting machine, we used a Cricut Cuttlebug™ for this step. If your machine is something different, adjust as needed.
Layer a platform and a C-size plate and align the edges. Place the White Daisy cardstock on top of this combination so that the line you have drawn is about 1/8″ below the bottom of the plate. This will put the right half of the cardstock on the plate and leave the left half of the cardstock hanging off the plate. Adhere the piece in place with washi tape so it will not move when it’s run through the die-cutting machine. Anything below the plate will not cut through.
Layer a B-size plate on top and run the paper through your die-cutting machine. You should end up with a partially cut letter, still attached on the left.
Repeat this step with all of your letters.
Step 4. Trim off the excess.
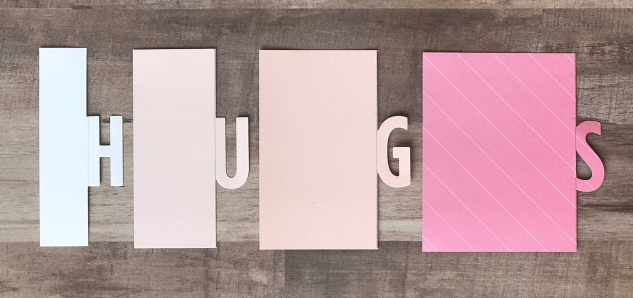
To get a clean, straight edge, trim along the pencil line with a paper trimmer. DO NOT CUT ALL THE WAY THROUGH! Leave the part of the letters that are supposed to be attached uncut.
Tip: for the center line of the S, trim with scissors.
Step 5. Assemble your card!
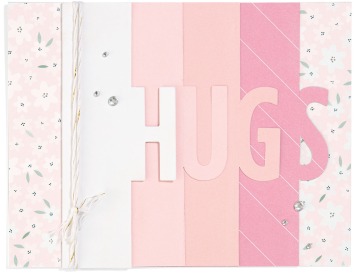
Erase any remaining pencil lines and build your card. Attach your letters to the white flower Pixie paper starting one inch from the left with the S on the bottom, followed by the G, then U, and then the H.
Tip: embellish with twine before attaching this front to the card base.
That’s all, folks! Use this technique to make a standard-sized card with any custom sentiment, anything between 4 to 6 letters long, using our Block Alphabet Thin Cuts!
Thanks for stopping by...REMEMBER to take advantage of these GREAT DEALS on our Thin Cuts, you'll have to get them before March 31st!!! Join my DIE-NAMITE MARCH party for a chance to WIN FREE GOODIES!!!

No comments:
Post a Comment
Thanks for showing some {{{love}}}....